
Creating 3D animations is like writing software. Both processes require
knowing certain industry terms. Some animation terms are:
- Modeling
- Texturing
- Rigging
- Setting up the scene with cameras, lights, and other effects
- Animating
- Rendering
Let’s define each of these, and then we’ll dig into some code with Blender’s API.
Modeling is the process of creating 3D models. One way is to represent the 3D model as points in 3D space. Each point, or vertex, has 3 coordinates: an X, an Y, and a Z coordinate, to define its location in 3D space. A pair of vertices can be connected by an edge, and edges bound polygons called faces. These faces define the surface of the model. Modeling is all about creating these sets of vertices, edges, and faces.
To create a model, we usually start with a primitive shape (like a sphere or a cube) and reshape it into what we’d like. Individual vertices, edges, and faces can be repositioned. New vertices, edges, and faces can be added to the basic model through simple operations. Two common ones are extrusion and subdivision.
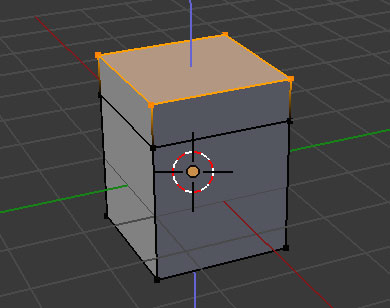
Extrusion takes a set of edges or faces, and pulls toward a specific direction to create new vertices, edges, and faces.
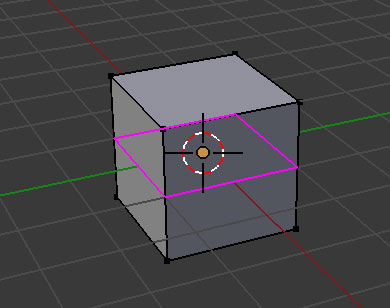
Subdivision takes an existing face and shatters it into multiple new faces. We can then transform these polygons individually.
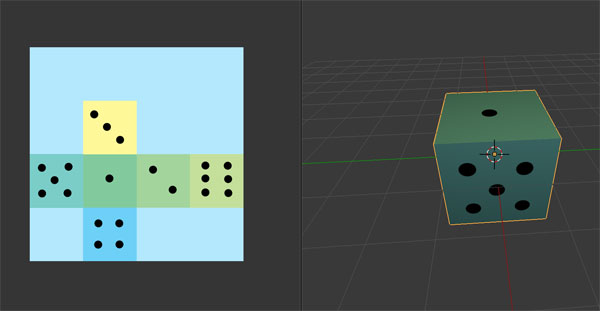
Modeling is only concerned with the shape of our objects. Texturing, on the other hand, is about assigning color and other surface properties. Usually, for a model, one texture image will be used to color the entire model. Projecting a 2D texture image onto a 3D model is a tricky problem. We address it with a technique called UV mapping.
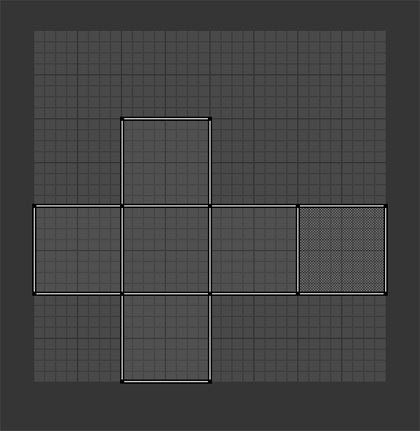
UVs are 2D coordinates that form 2D edges and faces. The UV faces map 1-to-1 with the model’s 3D faces. UVs overlay on top of the texture image such that the image a UV face masks will project onto the corresponding 3D face.
Unwrapping the 3D model to create good UVs is an art, just like using good design patterns. There’s different heuristics for UVs, but some common good goals are space efficiency (compacting all the UV faces) and not too many seams (which sets of UV clusters come together on the 3D model).
We’ve now got an object that’s been modeled and textured. If we want to animate it, we need to define how it can move. We do that by rigging the model. Technically, a model can be animated without rigging, but the animation movements are restricted to rigid movements (like translation, rotation, scale) that affect the whole model. If we want to create soft deformations, like, animating an arm to bend and wave, the model needs a rig.
To create a rig, you create bones and attach them to the arm. Bones serve as anchors of the animation such that whenever they move, their respective attached vertices will move. The weights on the vertices can be adjusted to adjust the degree the movements on the bone affect certain vertices.
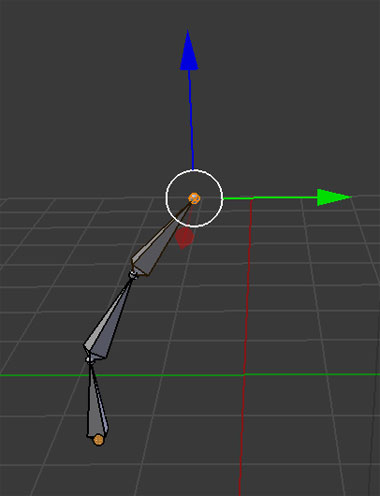
Suppose you push the wrist of an arm towards the body. You’d want the arm to bend at the elbow in a natural way, without having to move all the bones inside the arm individually. This sort of chained-together movement can be achieved through kinematics chains, where movement of bones in a chain affect each other.
After a model is set up for animation, the scene needs to be set up too. There are various ways to modify lights and camera to produce different visual effects. The camera is the window to view the scene. Although you may navigate the 3D scene at will, the final output animation will be from the perspective of the camera.
We now have a textured model, and we’ve defined how it can move. If we want to create an animated video, we need to determine when and where it should move. This is usually done by defining a few important moments (called keyframes) in which the models are in different positions. Then we can just tell our animation tool to interpolate the motion of the objects between those keyframes and “fill in” the animation for us. On a rigged model, the keyframes are set on the rig.

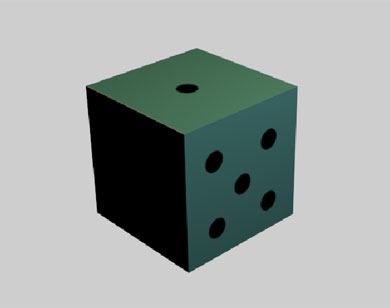
Rendering creates the final animation by calculating the interplay between the models, lights, shadows, and textures. It takes the 3D scene and produces a series of 2D images, where each image is a frame of the scene. These rendered images can be strung together to form animation videos.
There’s a lot of really fascinating computer science involved at every step in this process. Modeling operations are done using a bunch of linear algebra and rendering uses a technique called ray tracing. You don’t really need to know any of these to create a simple animation, but it can be interesting to dig into those details and learn how all these systems actually work.
Blender Overview
To get started creating 3D animations, you need a 3D graphics suite. There are many expensive commercial options available (like Autodesk Maya and Autodesk 3DS), but I really like Blender. It is free and open source, and is available on Windows, Mac, and Linux.

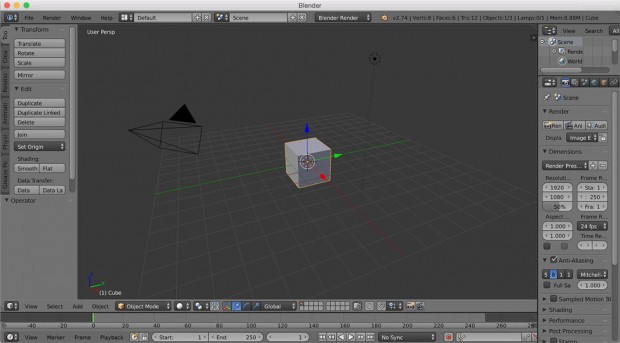
When you first launch the Blender application, the UI can be intimidating. There’s a vast array of buttons and tools. Learning Blender is akin to learning a text editor like Emacs. As you master Blender, you’ll appreciate Blender’s flexibility in customizing the user interface, mapping your own shortcut keys, as well as developing your own features in Python.
One tool you’ll need to fully utilize Blender is a three button mouse. Like many other 3D graphics software, the mouse provides a fine tuned navigation interface in the 3D environment. Of course, there are keyboard shortcuts for navigation, but the mouse is actually faster and more precise.
Blender’s default layout contains many areas. In the center is the 3D View, which enables manipulation of objects in the scene. Left of the 3D View is a panel for creating objects and moving objects. Right of the 3D View is a Properties editor that displays editable properties about a given object. There’s also an Outliner above that lists all the objects in the scene. There are many other editors and they all can be resized and rearranged at will.
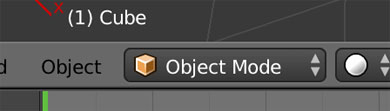
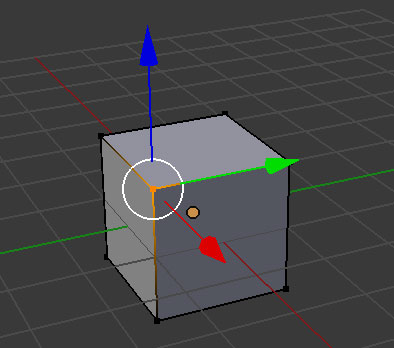
Object manipulation in Blender is modal. In Object mode, the manipulations on objects typically effect the overall object, such as scaling a cube. In Edit mode, the manipulations on objects typically are more fine grained and operate on subcomponents of the object, such as moving a corner of a cube. The modes can be toggled easily and is reflected on the 3D View UI.
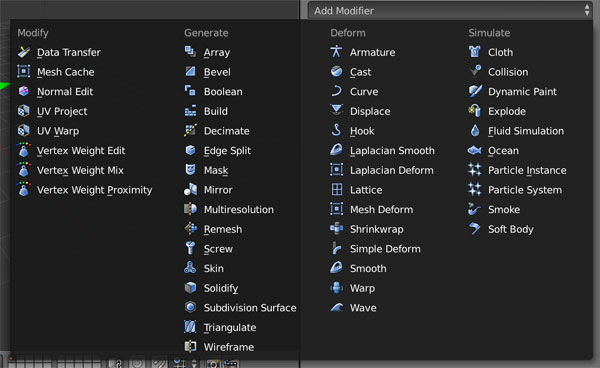
Blender also comes with a variety of Modifiers that add algorithmic effects to objects such as smoothing an object or simulate particles. They’re somewhat analogous to filters in image editing software. The Blender Community also contribute a large set of add-ons, built with the Blender API, that provide a lot of domain-specific features like tree generators, 3D printing tools, and molecule import tools.
To get started with Blender, here’s a quick start Blender tutorial I wrote. Blender also provides an official comprehensive manual. Videos such as the series from CGCookie and those from Youtube are also great resources for learning the basics.
Blender API Overview
Blender also has a Python 3 API, bpy. Almost every operation done through the UI has an API equivalent. This makes it easy to script anything from modeling to animations.
For example, to nudge an object along the X-axis from inside Blender:
import bpy

bpy.ops.transform.translate(value=(1,0,0))
Blender can also run headlessly to decrease render time. Scripts can be passed into headless Blender to take advantage of Blender’s functionality without compiling bpy as a standalone module.
blender -b -P my_script.py
Blender ships with its own internal Python interpreter and comes with an interactive Python console.
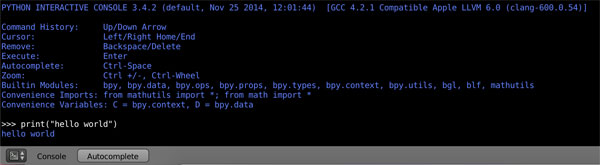
It also has a basic text editor to load/write and run Python scripts.

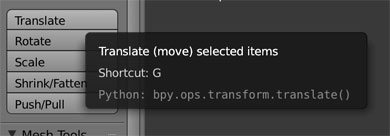
The Blender application has API tooltip hints, when you mouse over buttons and menus in the UI, to let the user know the API equivalent command. It also has excellent logging that logs operator calls and their parameters.
Documentation for bpy is comprehensive but sometimes does not describe the behavior as well as Blender’s User Manual. I recommend using both the documentation as well as the manual when scripting in Blender.
Summary
So we’ve taken high level overview on how to create an animation and how to approach Blender. Hopefully, this gives you a good framework to start diving in. There’s a learning curve, of course, but don’t be intimidated. You’ll find plenty of resources and communities online, much like StackOverflow. After you master the basics, you can leverage your software development skills to create even more awesome animations.